This guide documents the Download Docker File Definition self-service screen in the JDE Atina Build Manager. It replaces the manual steps described in Step 3: Microservice Installation of the JDE Atina Microservice Quick Start guide (steps 3.1 through 3.4) with a single guided screen: upload your environment configuration, fill in a few parameters, and download a ready-to-run zip.
It does not cover Step 1 (generating the INI configuration files on your JDE Deployment Server) or Step 2 (installing the interoperability libraries) — those are unchanged and covered by the rest of the Quick Start guide.
Prerequisites
The library build for this customer must have completed successfully before the setup screen is usable.
Step 1: Upload Environment Configuration Files
Each JDE environment you want the microservice to talk to (for example JDV920,
JPS920) needs its own folder containing at least jdbj.ini and jdeinterop.ini
(as produced by the Quick Start’s "Generate INI Configuration Files" step). The setup
screen offers two ways to get them in — use whichever is most convenient:
| Option | How it works |
|---|---|
A. Select a folder |
Click Upload Folder and pick the |
B. Upload a ZIP |
Works two ways: zip the environment folder itself (the environment name is taken from
the folder inside the zip), or zip just the loose |
Uploaded files land on the server under:
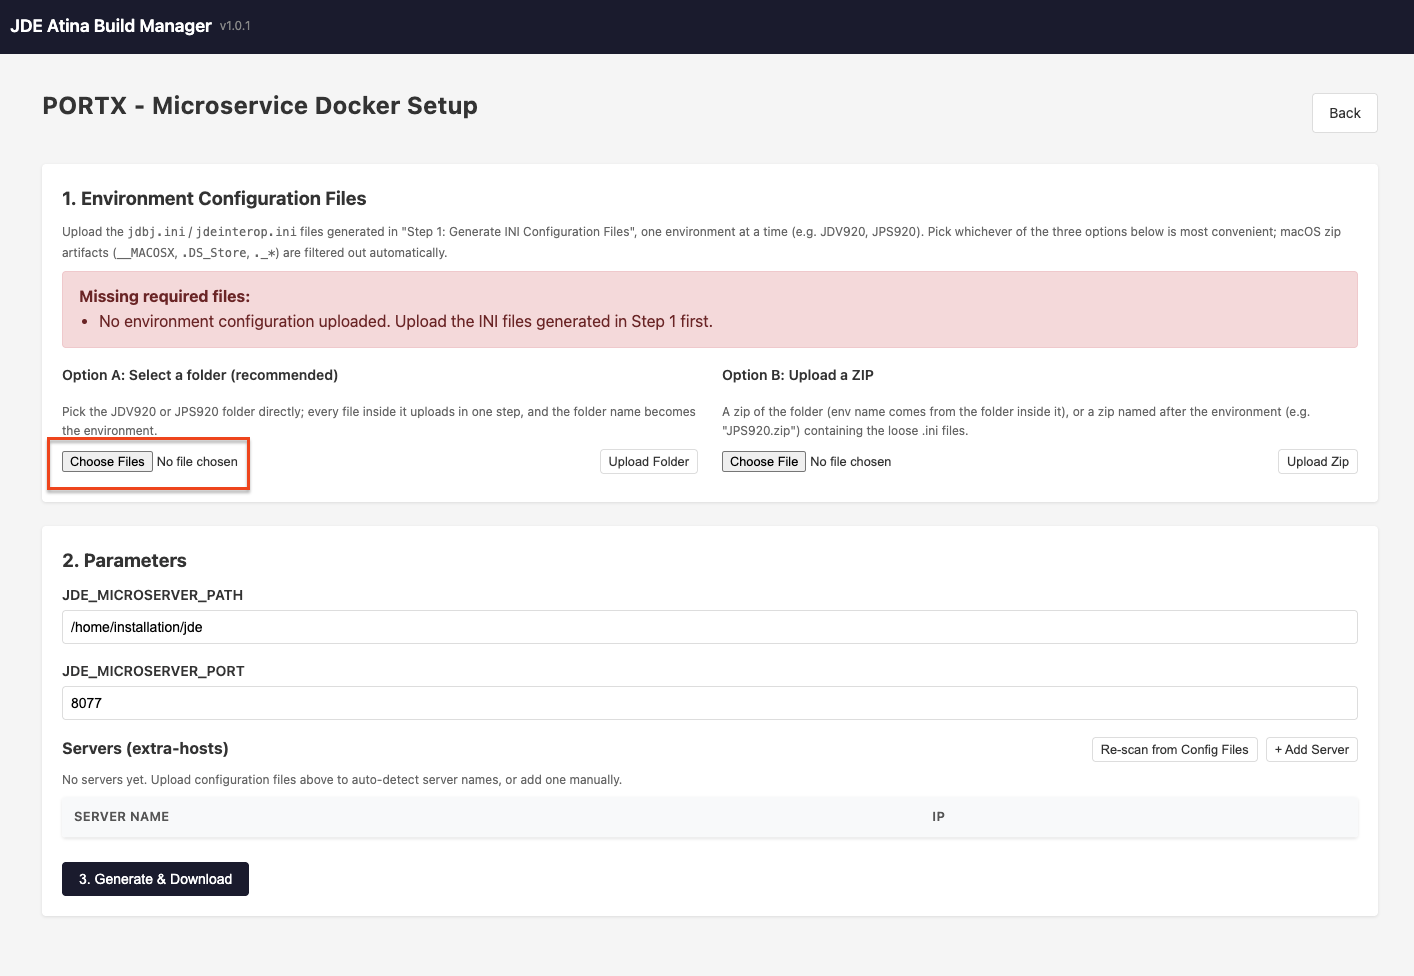
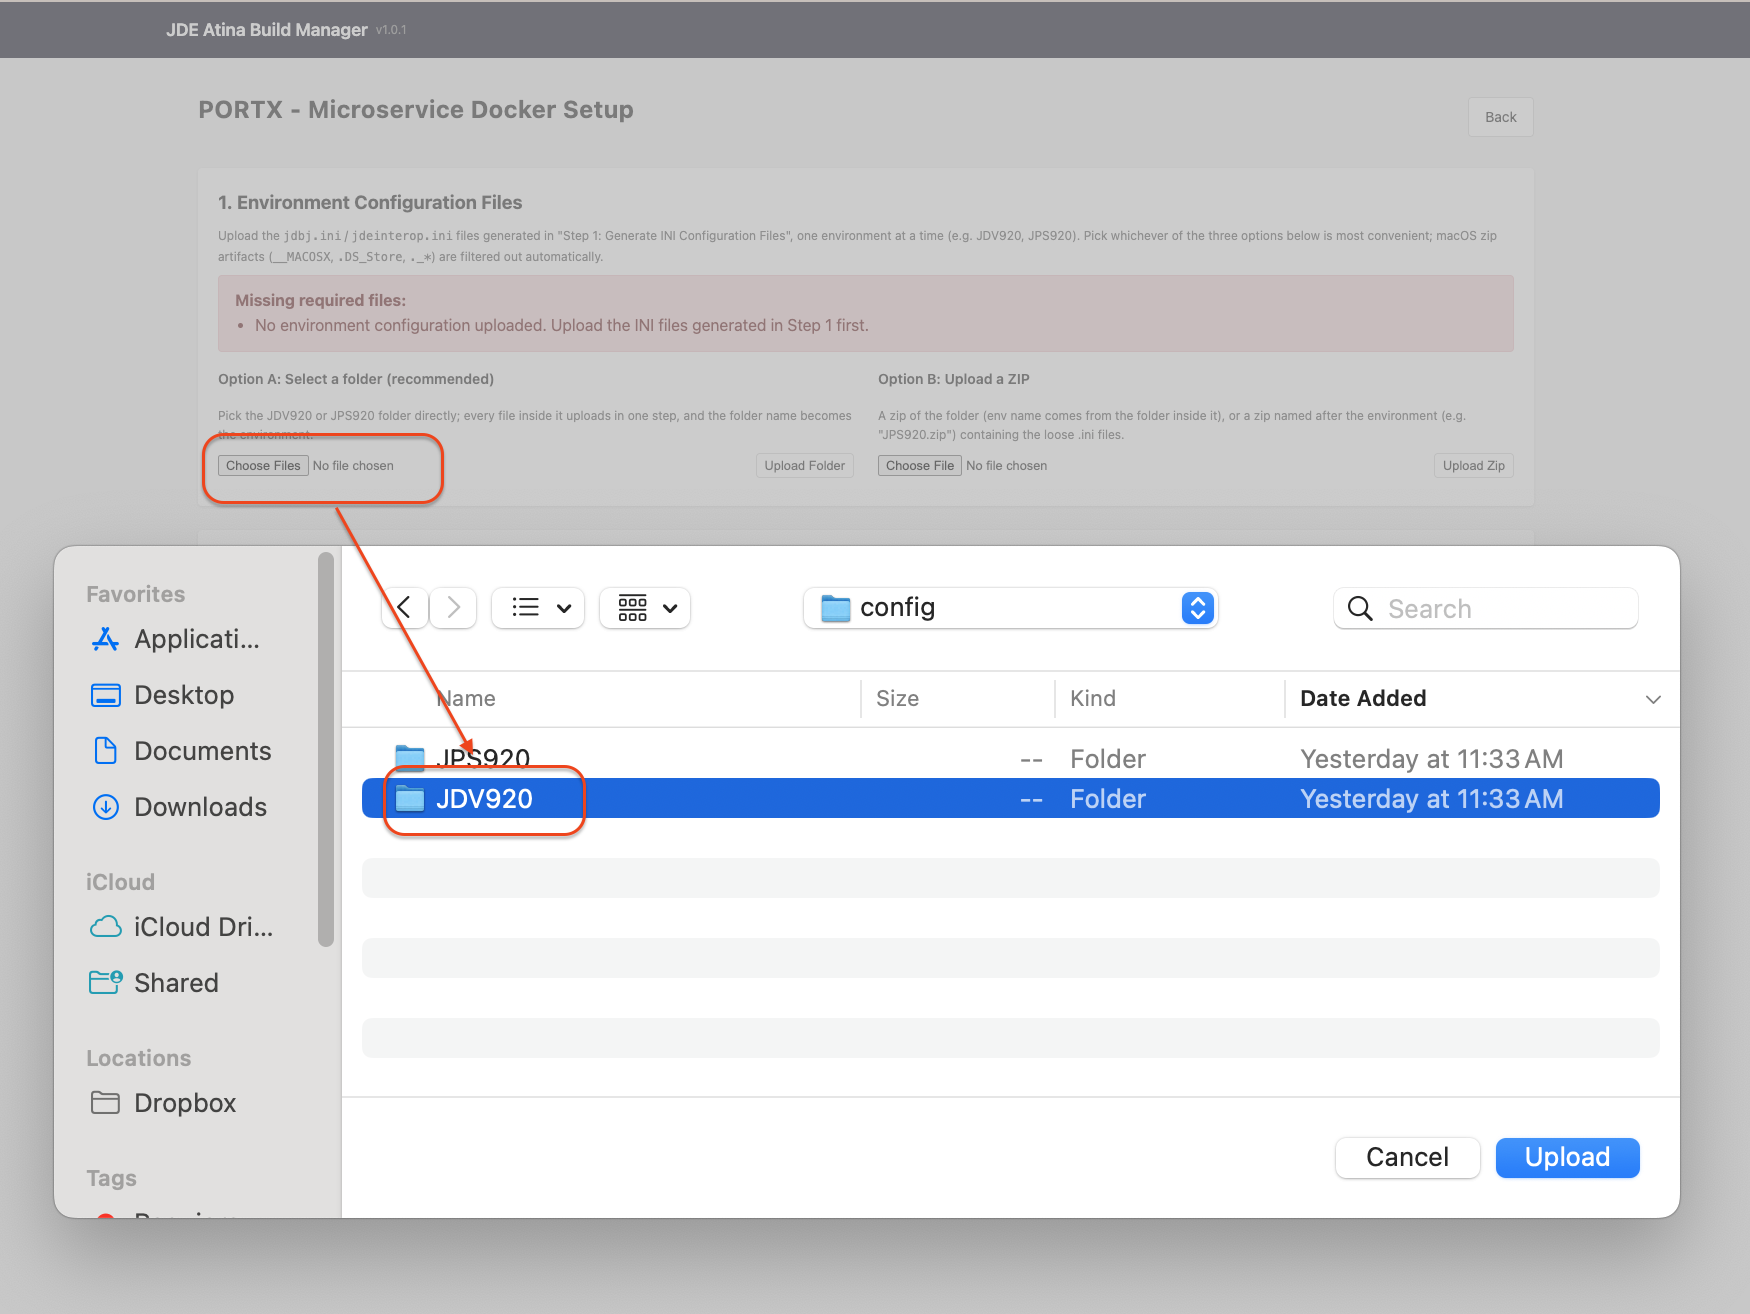
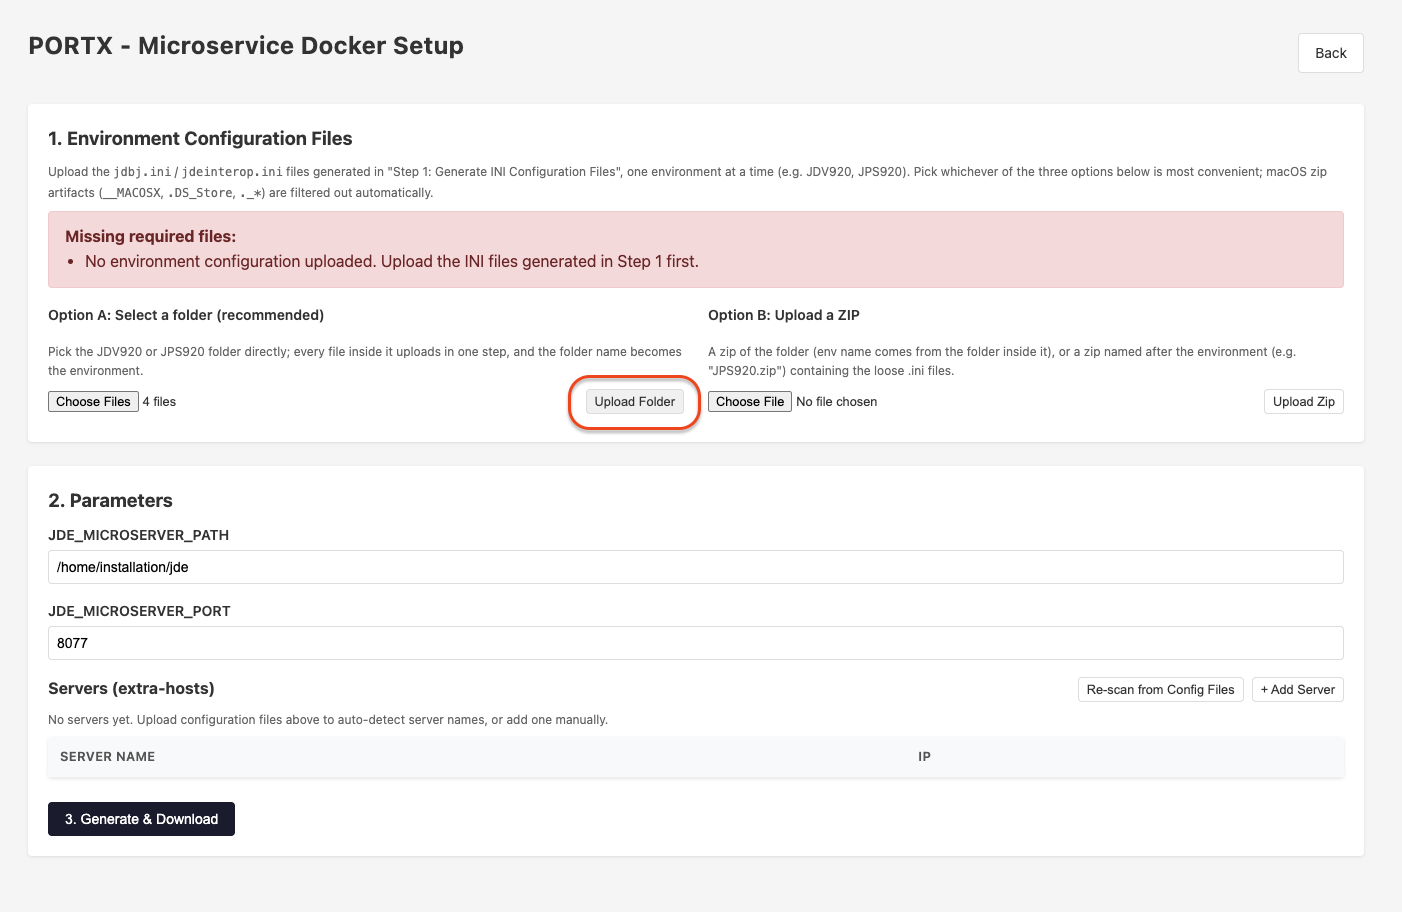
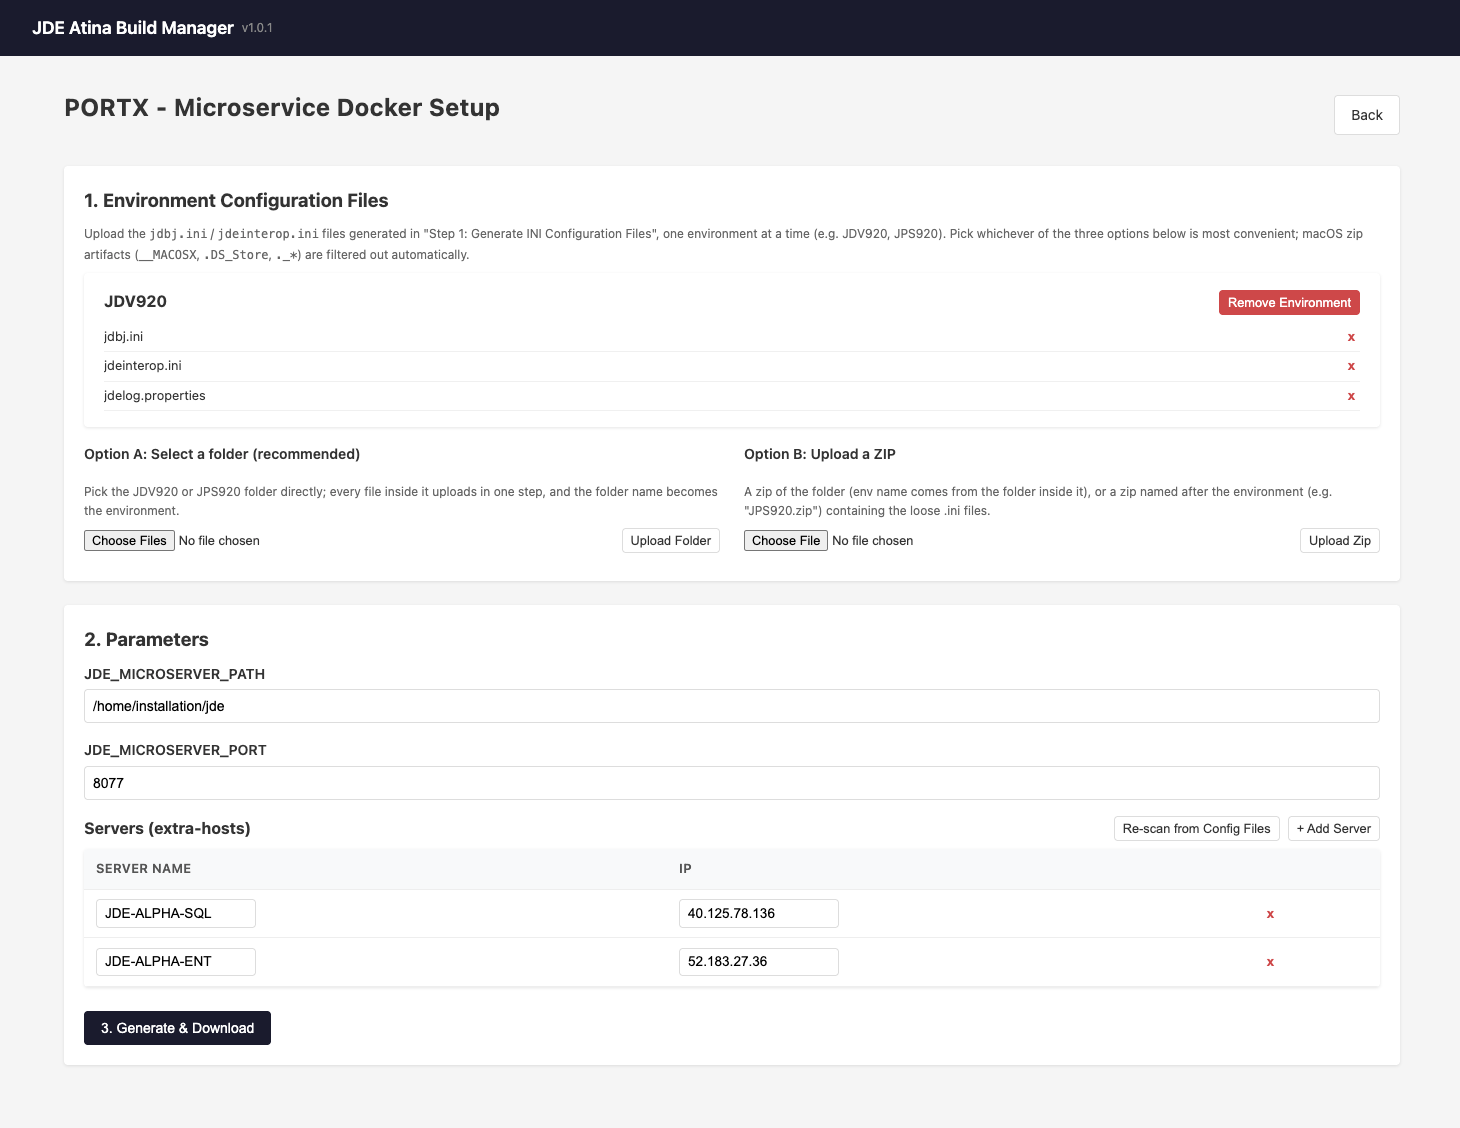
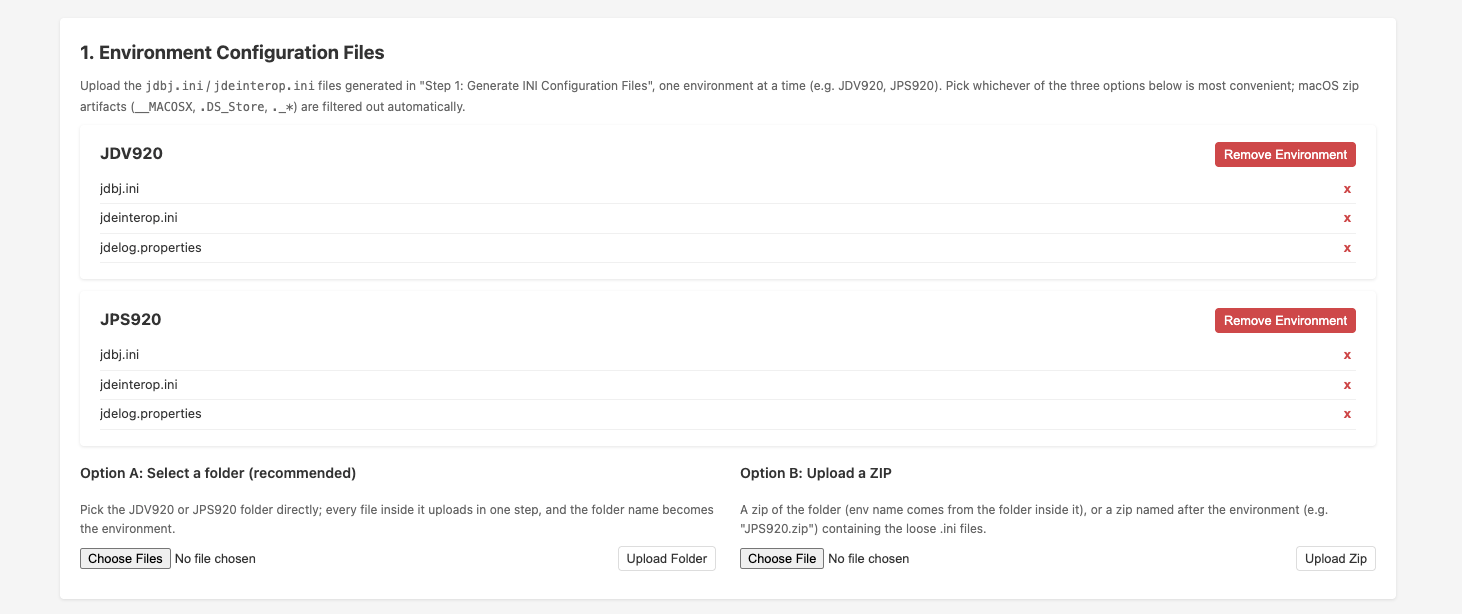
At this point, the JDV920 environment configuration has been uploaded. The system automatically analyzes the configuration and generates the extra-hosts.txt file, which is used by the Docker containers to resolve the JDE server hostnames to their corresponding IP addresses.
Each uploaded environment is listed as a card with its files; use the small x next to a
file, or Remove Environment on the card header, to delete what you no longer need. A
red banner lists any environment still missing jdbj.ini or jdeinterop.ini — both are
required before you can generate the installation files.
Repeat this process for each additional JDE environment (for example, JPS920, JPD920, etc.). Each uploaded environment configuration will be analyzed, and the corresponding server entries will be added to the extra-hosts.txt file automatically.
Step 2: Parameters
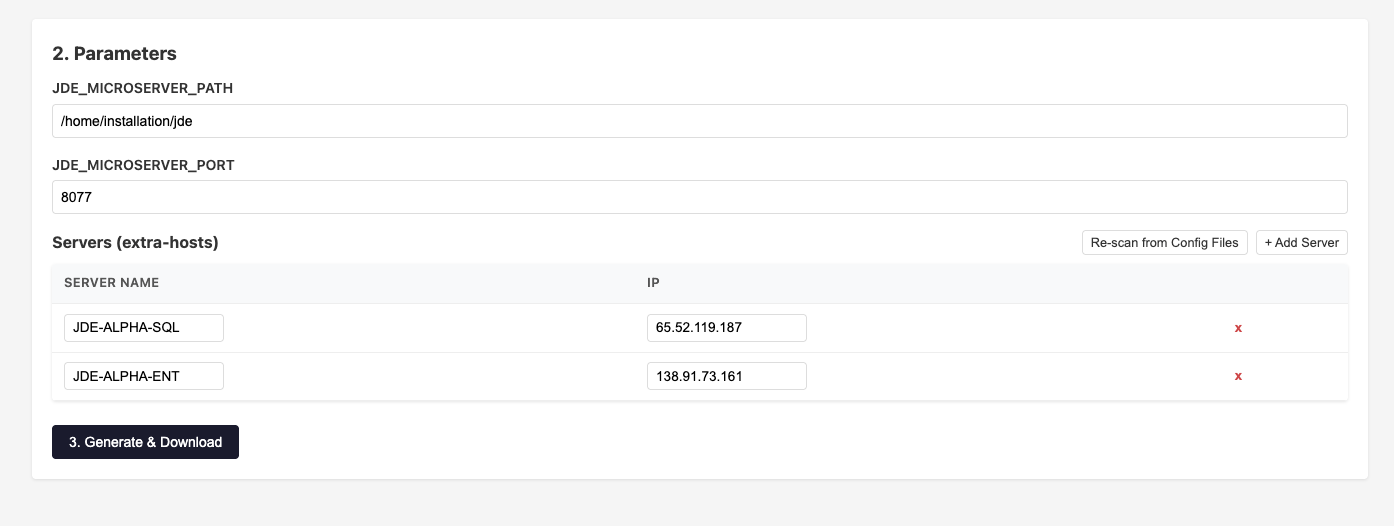
JDE_MICROSERVER_PATH and JDE_MICROSERVER_PORT
-
JDE_MICROSERVER_PATH— the absolute path on the target machine where you will expand the downloaded zip. It is baked into the generated.env(volume mounts, extra hosts file location), so it must match wherever you actually deploy the files. Defaults to/home/installation/jde. -
JDE_MICROSERVER_PORT— the port the microservice container exposes. Defaults to8077; change it if that port is already in use on the target host.
Servers (extra-hosts)
JD Edwards uses non-FQDN server names, so the microservice container needs an explicit name-to-IP mapping. The setup screen tries to auto-detect these names for you from the uploaded INI files:
| Source | Field |
|---|---|
|
|
|
|
|
|
|
|
If a [DNS_SERVERS] section is present in jdeinterop.ini, its NAME=IP entries are
used to pre-fill the detected server’s IP address. Otherwise the IP defaults to
1.1.1.1 and you must fill it in yourself.
You can freely edit this list:
-
Change any IP inline.
-
Click + Add Server to add a row manually (for a server not present in any INI file).
-
Click the x on a row to remove it.
-
Click Re-scan from Config Files to discard the current table and re-run auto-detection from whatever is currently uploaded (useful after uploading a new environment).
|
Auto-detection only pre-populates the list before you generate for the first time. Once you have generated at least once, your edits (including deletions) are saved and shown as-is on your next visit — the screen will not silently re-add a server you removed. Use Re-scan from Config Files if you want a fresh auto-detected list after that point. |
All of the above — path, port, and the server list — is persisted to this customer’s record as soon as you generate, so you can safely come back later without re-entering anything.
Step 3: Generate & Download
Clicking Generate & Download runs the equivalent of Quick Start steps 3.1-3.4 automatically:
-
Downloads the
jde-docker-filesdistribution matching the configured version from the Atina Artifactory repository. -
Expands it, filling in
JDE_MICROSERVER_PORT,JDE_MICROSERVER_CODE(the customer ID), the extra-hosts file path, and the volume path variables in.env. -
Writes
extra-hosts.txtfrom the server list above. -
Creates the
jde/data/logs,jde/data/tmpandjde/data/jdelogvolume directories. -
Rewrites the JDE environment configuration volume mounts in
docker-compose.ymlto match the environments you uploaded in Step 1. -
Adds a
README.txtwith the next steps (see below). -
Zips everything and downloads it to your browser.
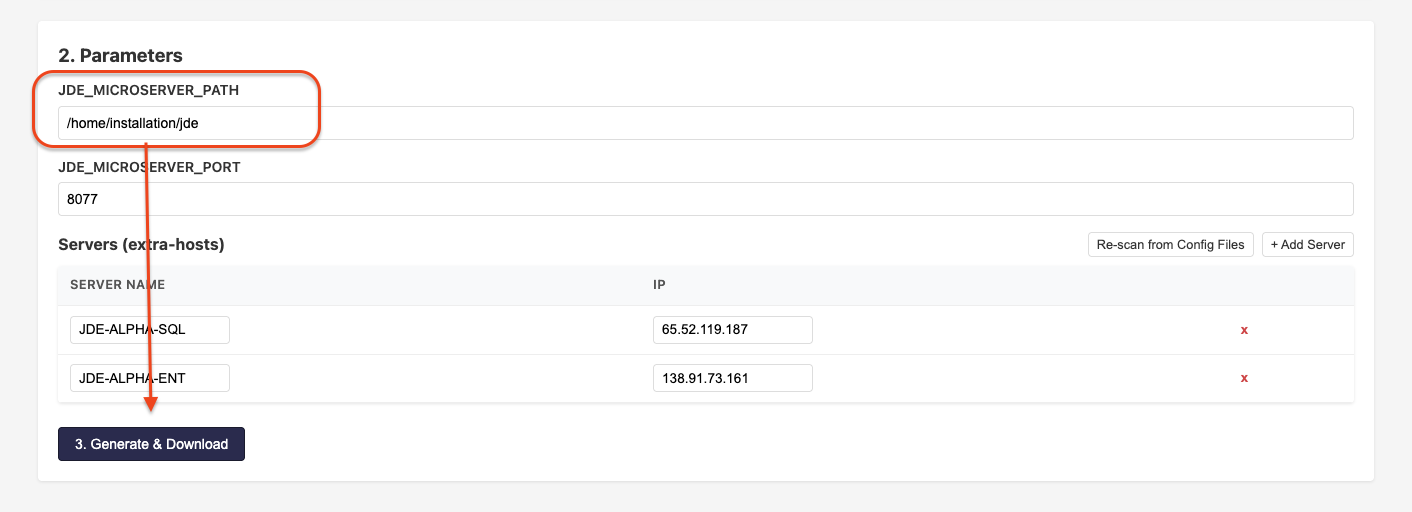
A progress overlay is shown while this runs (it involves a network download, so it can take a few seconds). If validation fails — build not OK, a required INI file missing, or the distribution couldn’t be downloaded — a dialog explains what to fix; nothing is downloaded.
You can repeat this step as many times as you like (e.g. after changing a parameter or uploading another environment); each run re-downloads and regenerates the files.
Step 4: Edit Generated Files (optional)
Once at least one generation has completed, two buttons appear to hand-edit the result:
-
Edit .env
-
Edit docker-compose.yml
Each opens the current file content in a text area. Saving does not overwrite the
original — it writes a sibling file with a -edited suffix (.env-edited,
docker-compose-edited.yml). Both the original and the edited version, if present, are
included the next time you click Generate & Download, so you can hand-tune the result
without losing the auto-generated baseline or having your manual edits silently discarded
when you regenerate for an unrelated reason (e.g. adding another environment).
After Downloading
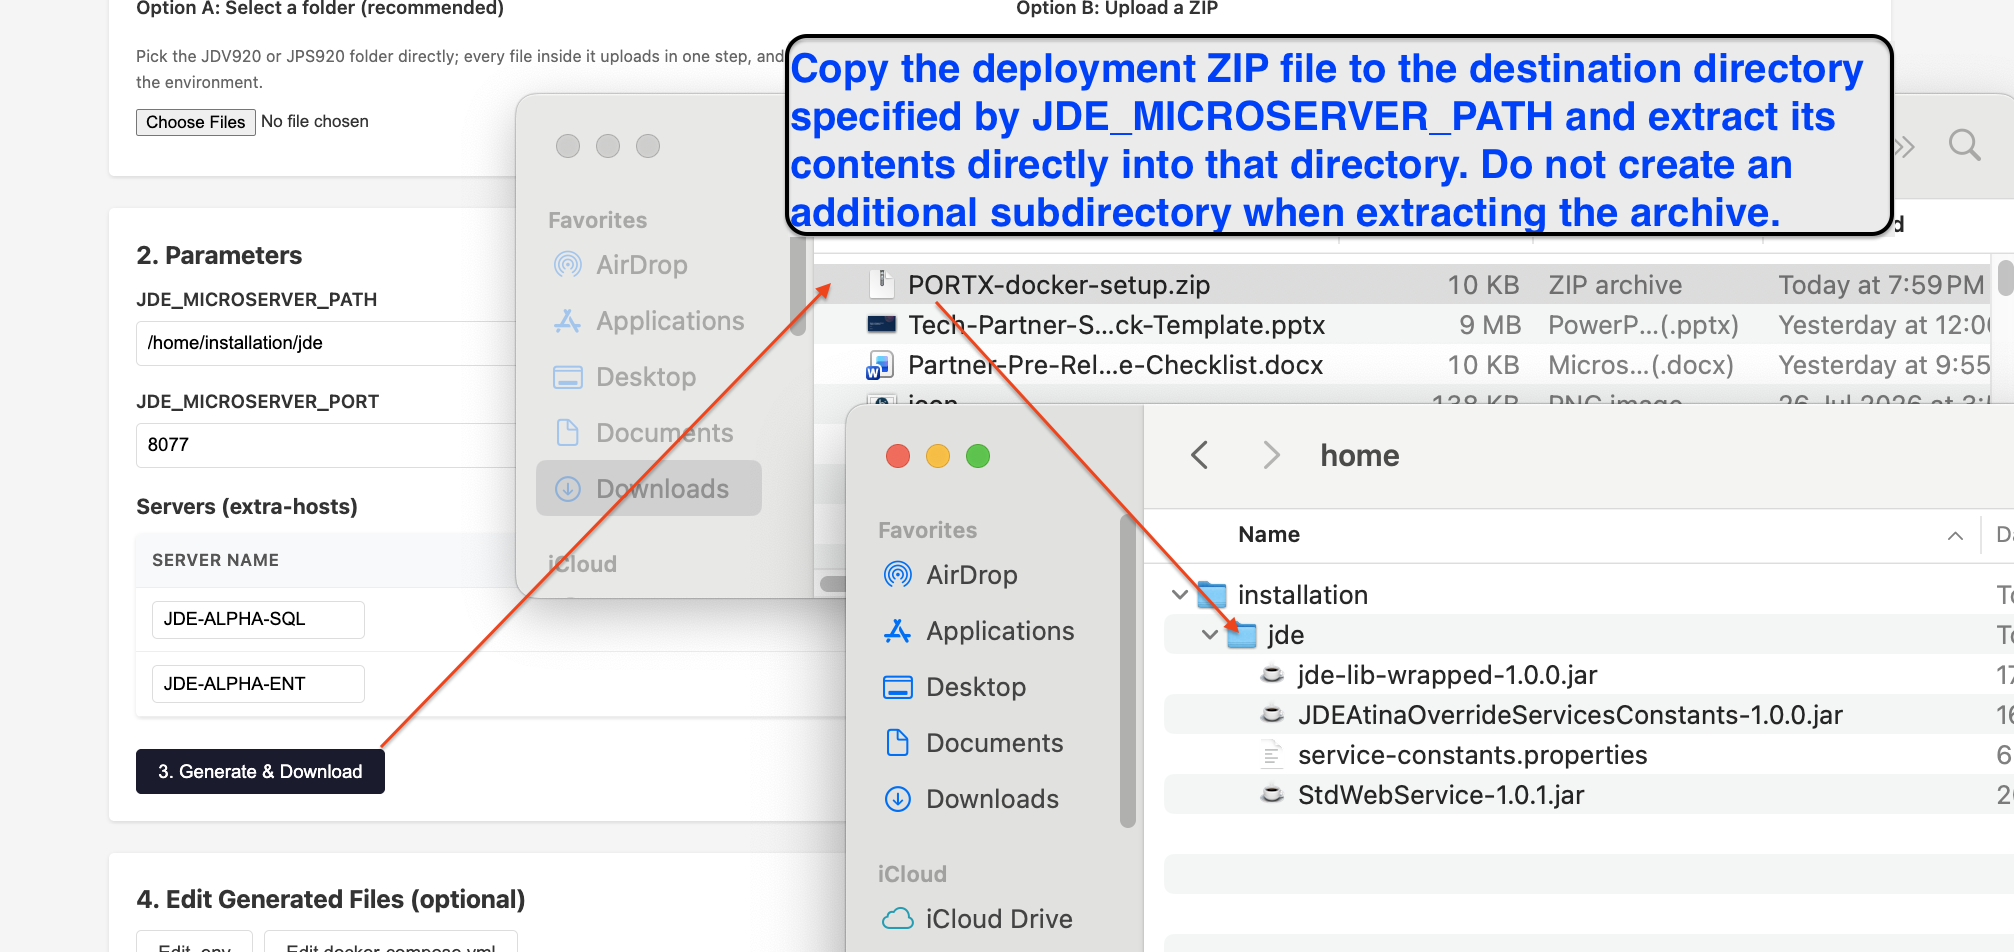
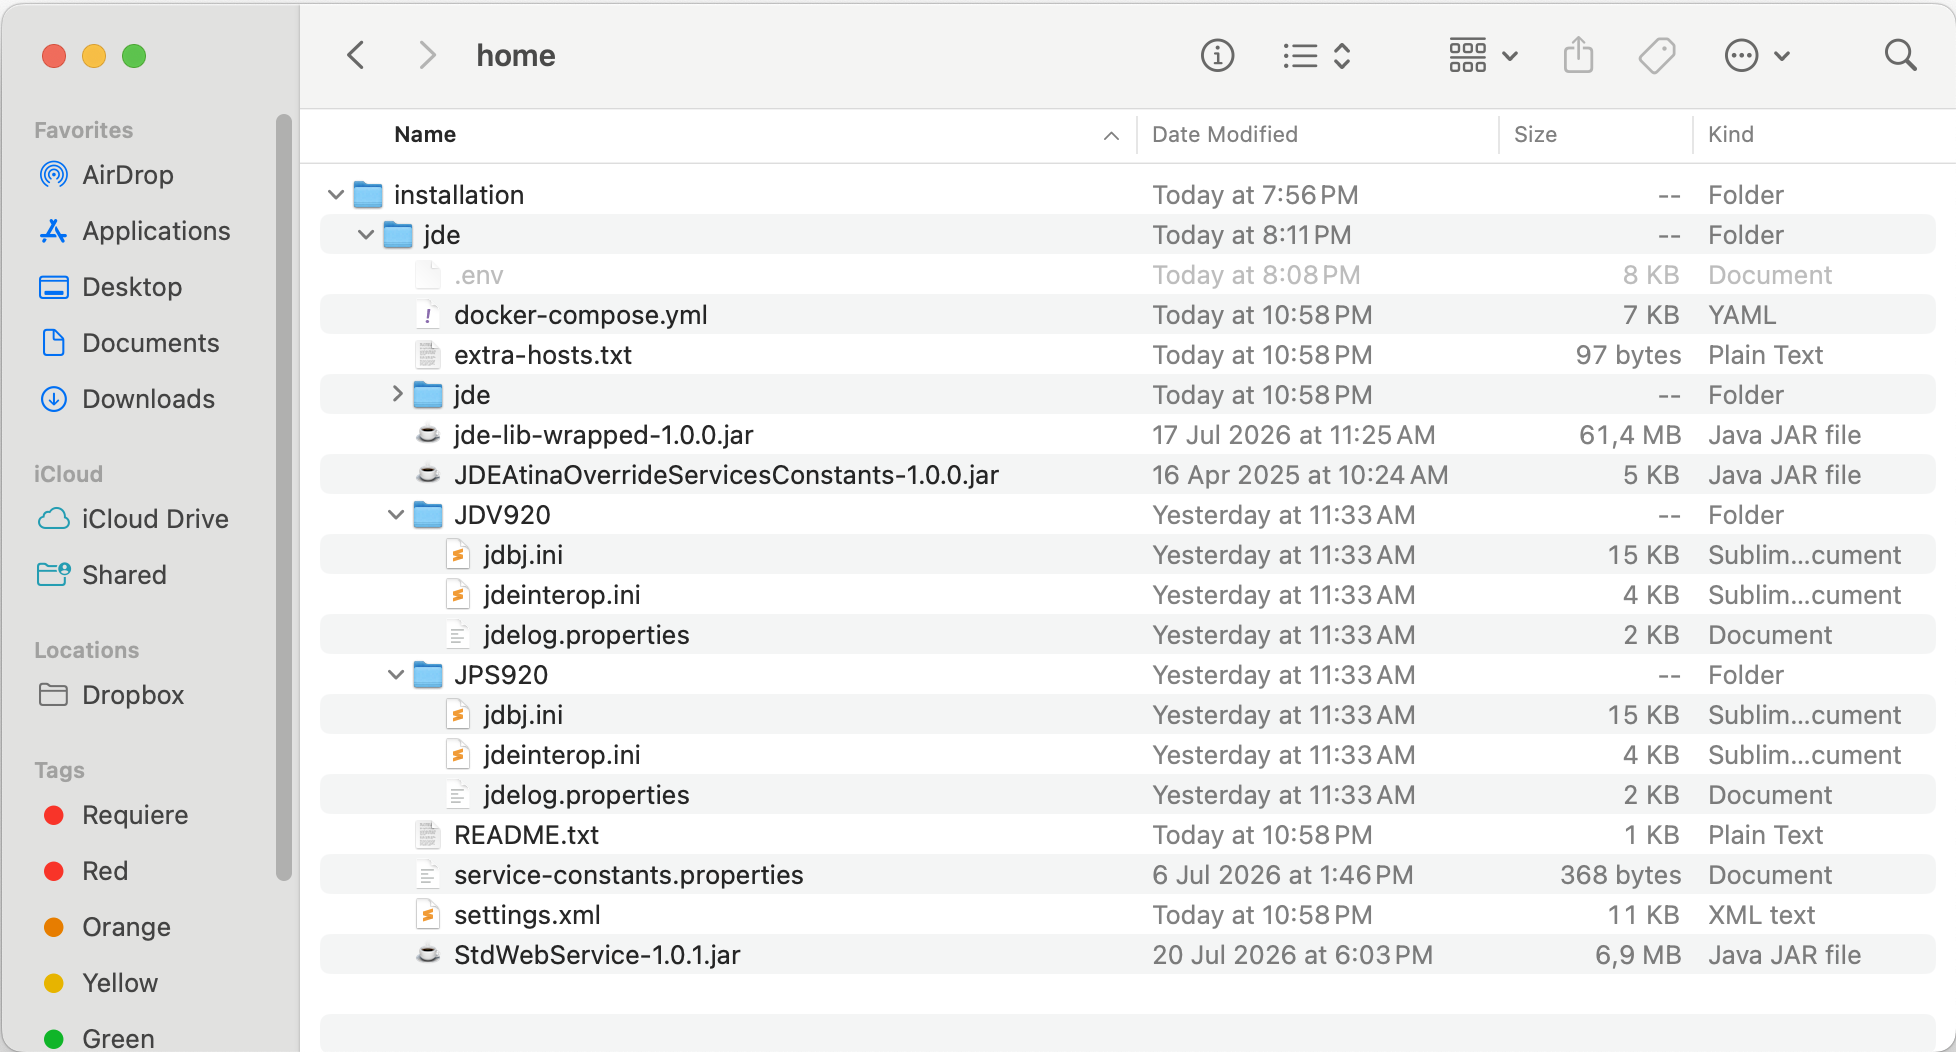
Expand the zip into the folder you set as JDE_MICROSERVER_PATH on the target host. The
zip includes a README.txt with the next steps:
docker compose --env-file .env up -d --force-recreate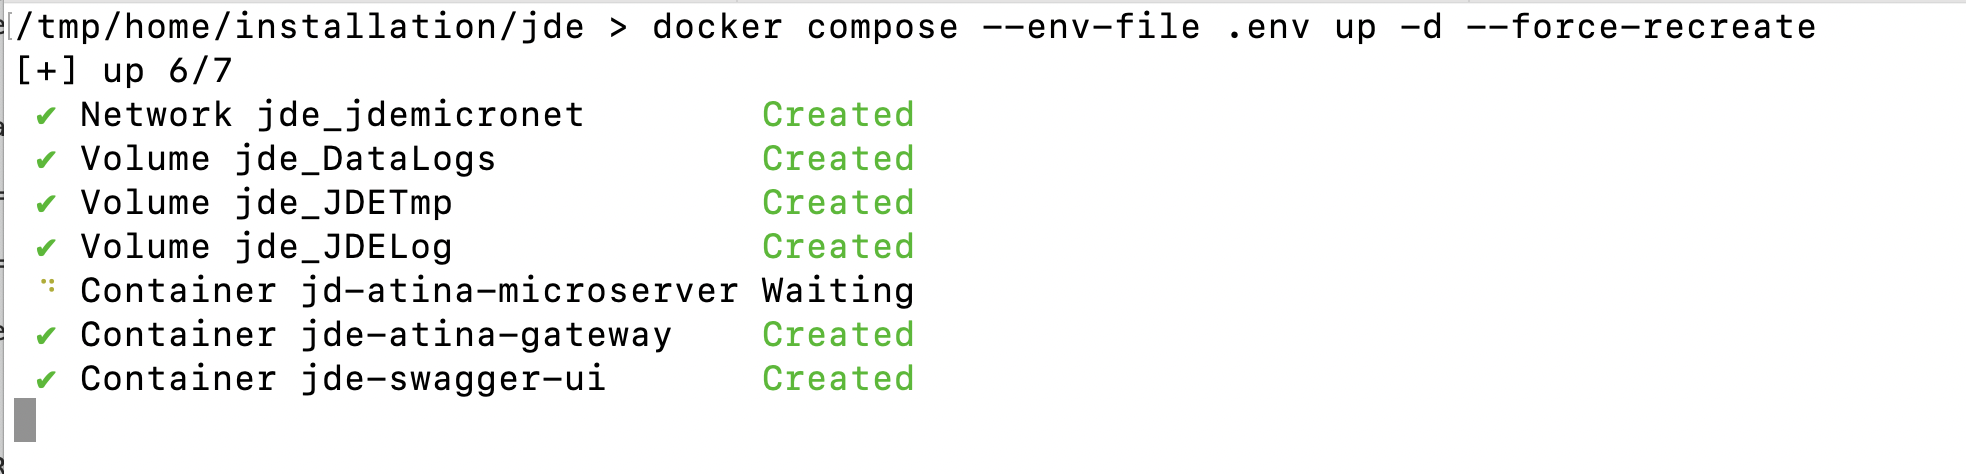
If you change any configuration afterwards, stop and remove the container along with its volumes so the change takes effect on next startup:
docker compose down -vTo validate the deployment, use the Atina Panel Manager, or follow Quick Start Step 3.6 - Validate the Microservice Deployment.